Sorting waste at home is the foundation of effective recycling. It may seem overwhelming at first, especially with all the materials we deal with daily, but once you establish a routine and understand a few key principles, it becomes second nature.
In this article, we’ll walk through a simple, step-by-step approach to sorting your waste correctly. With this guide, you’ll be able to reduce contamination, recycle more efficiently, and help the environment — all starting from your own kitchen, office, or apartment.
Why Sorting Matters
Before diving into the steps, it’s important to understand why sorting is essential. When waste is mixed incorrectly — for example, a greasy pizza box in a paper bin or a glass jar full of food residue — it can contaminate entire batches of recyclable materials. This often leads to everything being discarded, even if most of the items were recyclable.
Proper sorting:
- Increases recycling efficiency
- Reduces landfill waste
- Prevents contamination
- Supports the circular economy
- Helps recycling centers process materials correctly
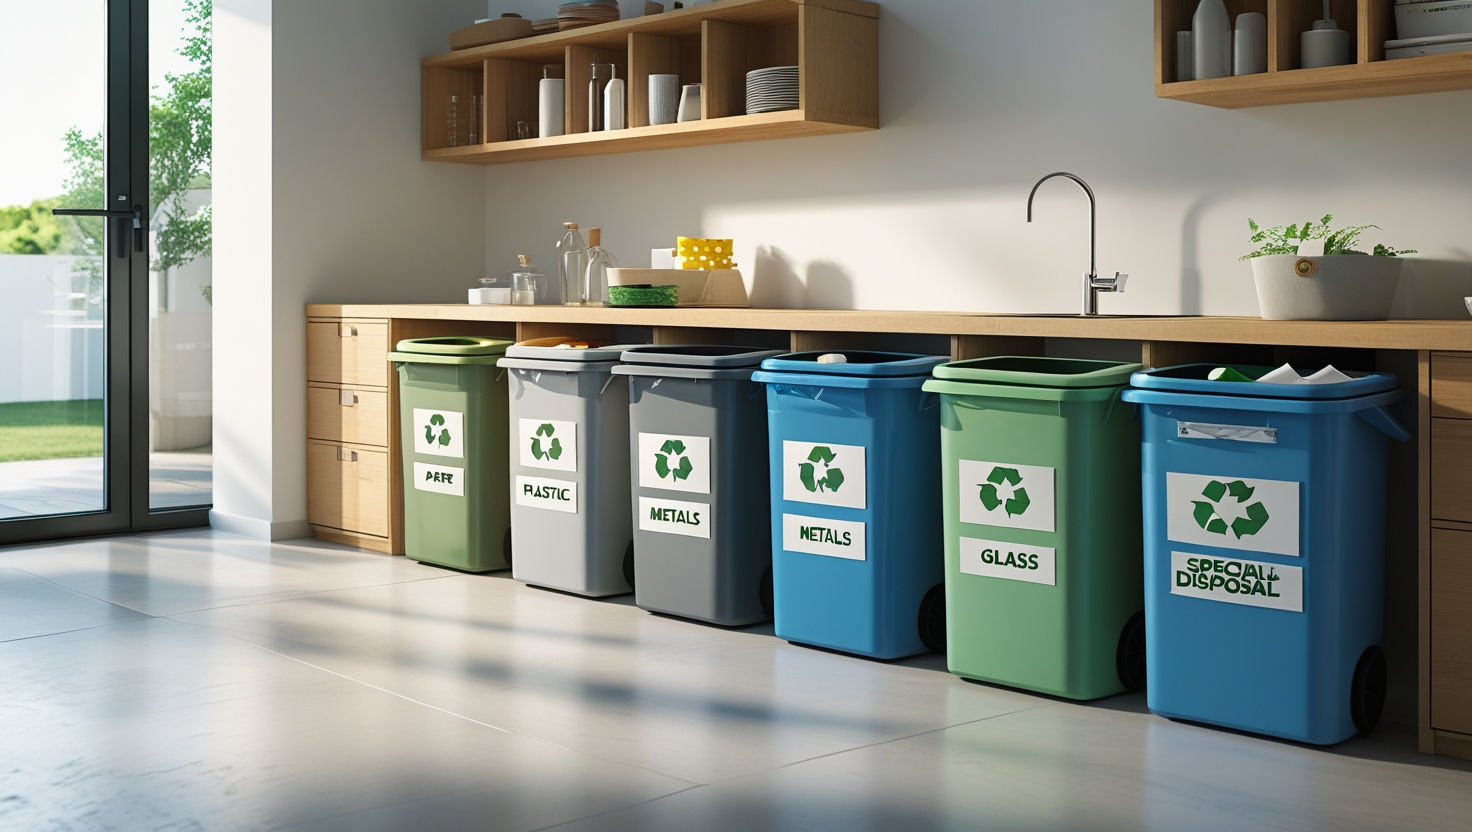
Step 1: Set Up Your Sorting Station
Choose a visible and accessible area in your home to place your bins. You don’t need anything fancy — even a few reusable containers or boxes will do.
Ideally, have at least four clearly labeled bins or sections for:
- Paper and cardboard
- Plastics
- Metals and cans
- Glass
You might also want a fifth bin for organic waste, if you plan to compost, and a separate container for items requiring special disposal (like batteries, electronics, and light bulbs).
Tip: Use color-coded labels to help identify each category more easily — especially helpful for kids or guests.
Step 2: Learn What Belongs in Each Bin
Every recycling program is slightly different, but here’s a general guideline to follow:
Paper and Cardboard
Include newspapers, office paper, clean cardboard, cereal boxes, and paper bags. Remove any tape or labels when possible.
Avoid: Dirty paper (e.g., used napkins), laminated or waxed paper, and heavily dyed materials.
Plastics
Focus on plastics labeled with the recycling numbers 1 (PET), 2 (HDPE), and 5 (PP). These include water bottles, milk jugs, shampoo bottles, and yogurt containers.
Avoid: Plastic bags, wrap films, styrofoam, and unmarked plastics — unless your area accepts them separately.
Metals and Cans
Recycle clean aluminum cans, tin cans, steel food containers, and metal jar lids.
Avoid: Aerosol cans, greasy foil, and any metal with leftover food or hazardous residue.
Glass
Acceptable glass includes clean bottles and jars (clear, brown, or green).
Avoid: Broken glass, window panes, mirrors, ceramics, and light bulbs.
Step 3: Clean Before You Recycle
Contaminated materials are one of the main reasons that recycling loads are rejected. Take a few seconds to rinse containers and let them dry before placing them in the bin.
Examples:
- Rinse out a tomato sauce jar
- Wash yogurt or cream containers
- Shake out crumbs from cardboard food boxes
This step greatly increases the chances that the materials will actually be recycled.
Step 4: Handle Special Waste Separately
Certain items do not belong in your main recycling bins but can still be recycled through specific channels.
Set aside a container for:
- Batteries (drop off at electronics or hardware stores)
- Electronics (take to local e-waste collection points)
- Light bulbs and fluorescent tubes (often accepted at home improvement stores)
- Ink cartridges (accepted by some office supply retailers)
- Plastic bags (some supermarkets collect them for special recycling)
Don’t throw these into the trash or your regular recycling — they require special handling to avoid environmental harm.
Step 5: Don’t Forget the Organic Waste
If you have a garden or space for a compost bin, consider separating your food scraps and biodegradable waste.
You can compost:
- Fruit and vegetable peels
- Coffee grounds and tea bags (without staples)
- Eggshells
- Dry leaves and grass
Avoid composting:
- Meat, dairy, or oily foods (they attract pests)
- Glossy paper or chemically treated wood
Composting reduces methane emissions and creates nutrient-rich soil.
Step 6: Reduce Before You Recycle
Remember that recycling is only part of the solution. Reducing your waste in the first place is even more impactful.
Tips to reduce waste:
- Buy in bulk to avoid excess packaging
- Choose products with recyclable or reusable packaging
- Use cloth bags and containers instead of disposables
- Avoid single-use plastics
When you reduce waste, there’s less to sort, manage, and recycle.
Step 7: Stay Updated on Local Guidelines
Check with your municipality or waste collection service for specific rules. Some regions accept more materials than others, and rules can change over time. Many cities provide online sorting guides, collection calendars, and even mobile apps to help you stay informed.
Step 8: Educate Others in Your Home
Involve everyone in the household by explaining your sorting system. If you live with family, roommates, or children, make the process easy and visible.
Consider:
- Posting a printed guide near your bins
- Color-coding bins for quick recognition
- Making a game or challenge for kids to learn recycling
The more people participate, the more effective your system becomes.
Sorting Waste Makes a Real Difference
Sorting waste is one of the simplest, most effective steps you can take for the environment. Once it becomes a habit, it’s easy to maintain — and you’ll feel empowered knowing your efforts help reduce pollution and conserve resources.
Start small, stay consistent, and don’t worry about perfection. Every correctly sorted bottle, box, and container counts.